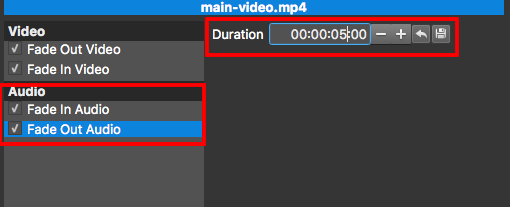
As is known to all, fade in and fade out transitions can prevent your video from appearing choppy. Video fade-ins begin at a natural black screen to the video picture and video fade-outs begin at the video picture to a neutral black screen. Audio fade-ins begin with silence and increase to full volume, and fade-outs begin at full volume and decrease to silence. This tutorial explains how to fade in and fade out your video and audio tracks.
Step 1: Add your video/audio files to the representative track on the timeline. Video clips should be placed on the video track and audio files should be placed on the audio track.

Step 2: Add video fade-ins and fade-outs to the video track
Select the target video clip and click on “Filter” tab on the main interface, then click “+” button to add “Fade in Video” and “Fade Out Video” filters to the target video clip. When you add the filters, you can set the duration time of the fade effect to control the gradient effect of the video picture. You can preview the effect by playing this video.

Step 3: Add audio fade-ins and fade-outs to the audio track
If your video clip contains an audio track, you can select this clip and add “Fade in Audio” and “Fade Out Audio” filters to the target video clip by clicking on “Filter” tab on the main interface. After then, set the duration time to control the change of audio volume. If you want to add audio fade-ins and fade-outs to another audio clip on the audio track, just select the audio clip firstly, then follow the above steps to add “Fade in Audio” and “Fade Out Audio” filters to the target audio clip.


