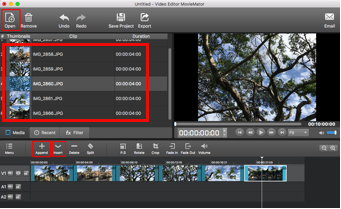
Step 1: Add images to the Video Track in the Timeline. Add your images to the video track in the timeline for editing. You can upload multiple photos at one time.
Tips: You can freely adjust the length of each image clip by dragging the edge of the clip on the timeline so that you can control the time that each photo will be played.

Step 2: Add Transitions to Photos (Optional)
Now you can add transitions between images to make the transition smooth and appropriate for the content. Drag image to create overlap between photos firstly. Right click on the green rectangle and tap “Properties” to choose your desired transition that suits the overall style of your video.

Step 3: Add Text for Your Video (Optional)
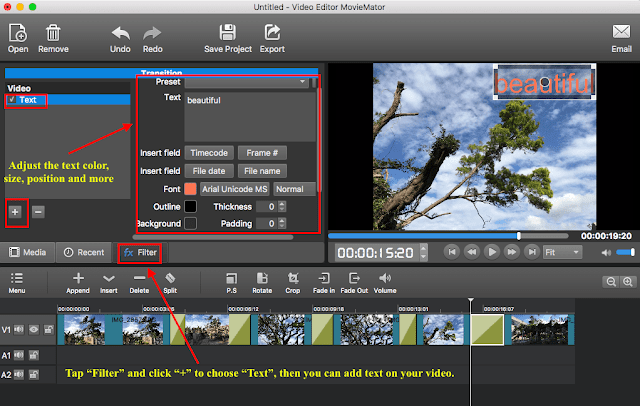
Click on “Filters” on the main interface and click “+” button to choose the “Text” option. Once users click “Text”, an editable text box will display on the video and you are capable of adjusting parameters like font, size, color, position, background and more of the text box. It is available for you to input any content in the text box so that they are free to add any text to your video.

Step 4: Import Music to the Audio Track. Music files will be added to the audio track.
Tips: If the video and the sound track lengths do not match, the easiest way is to trim the longer track.

Step 5: Export Your Video Once you complete editing your project, you can preview the effect by playing it. Then you can export it as any time of media.


