Now that you’ve successfully installed Drupal, we can get into the steps of building a site using the platform. Let’s get an in-depth look.
Understanding Drupal Administrator Dashboard
First off, you should learn about the Drupal administrator dashboard. To do so, you need to login by adding user/login at the end of your Drupal URL. As such, it can be accessed via https://your-site-address/user/login.
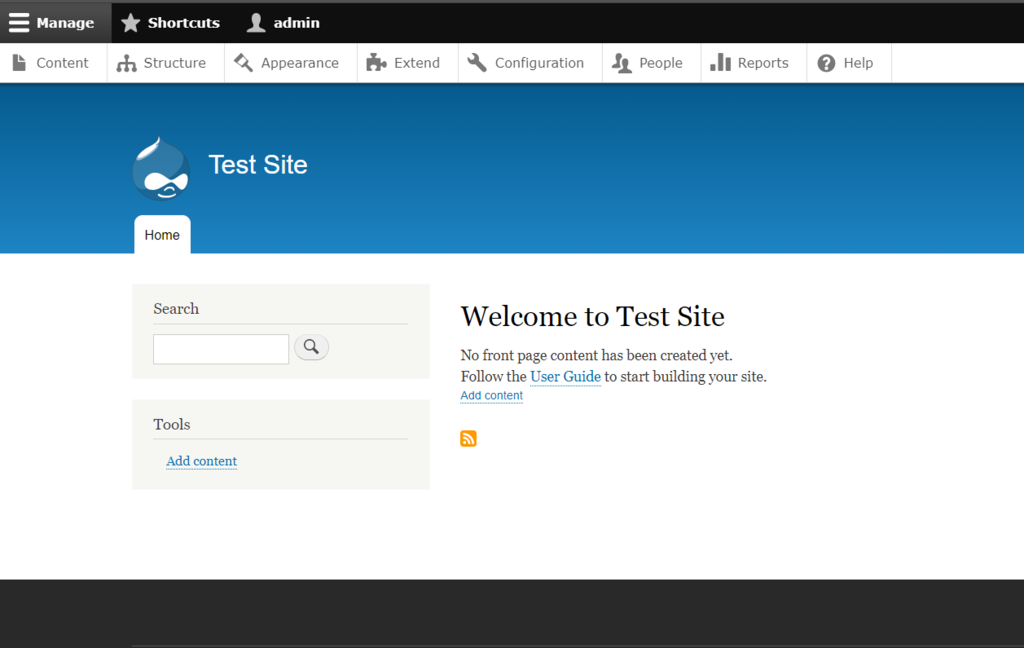
Once logged in, click Manage at the top left corner of the page. The following sections will be shown.
1. Content – this section allows you to add content, including an article or a basic page.
2. Structure – here, you can manage the components of your site’s structure, such as block layouts, comment types, and content types.
3. Appearance – it allows you to install or uninstall themes. You can also change your theme’s settings.
4. Extend – in this tab, you can download and install modules to enhance your website’s functionality.
5. Configuration – this tab allows you to edit various configurations, such as basic site settings and account settings.
6. People – you can manage user accounts, permissions, and roles in this tab.
7. Reports – here, you can monitor your site by checking recent log messages or status report.
8. Help – if you ever need help when getting started with your site, you can check out this tab.


